 Thoroughbred Racing ManagerPlay free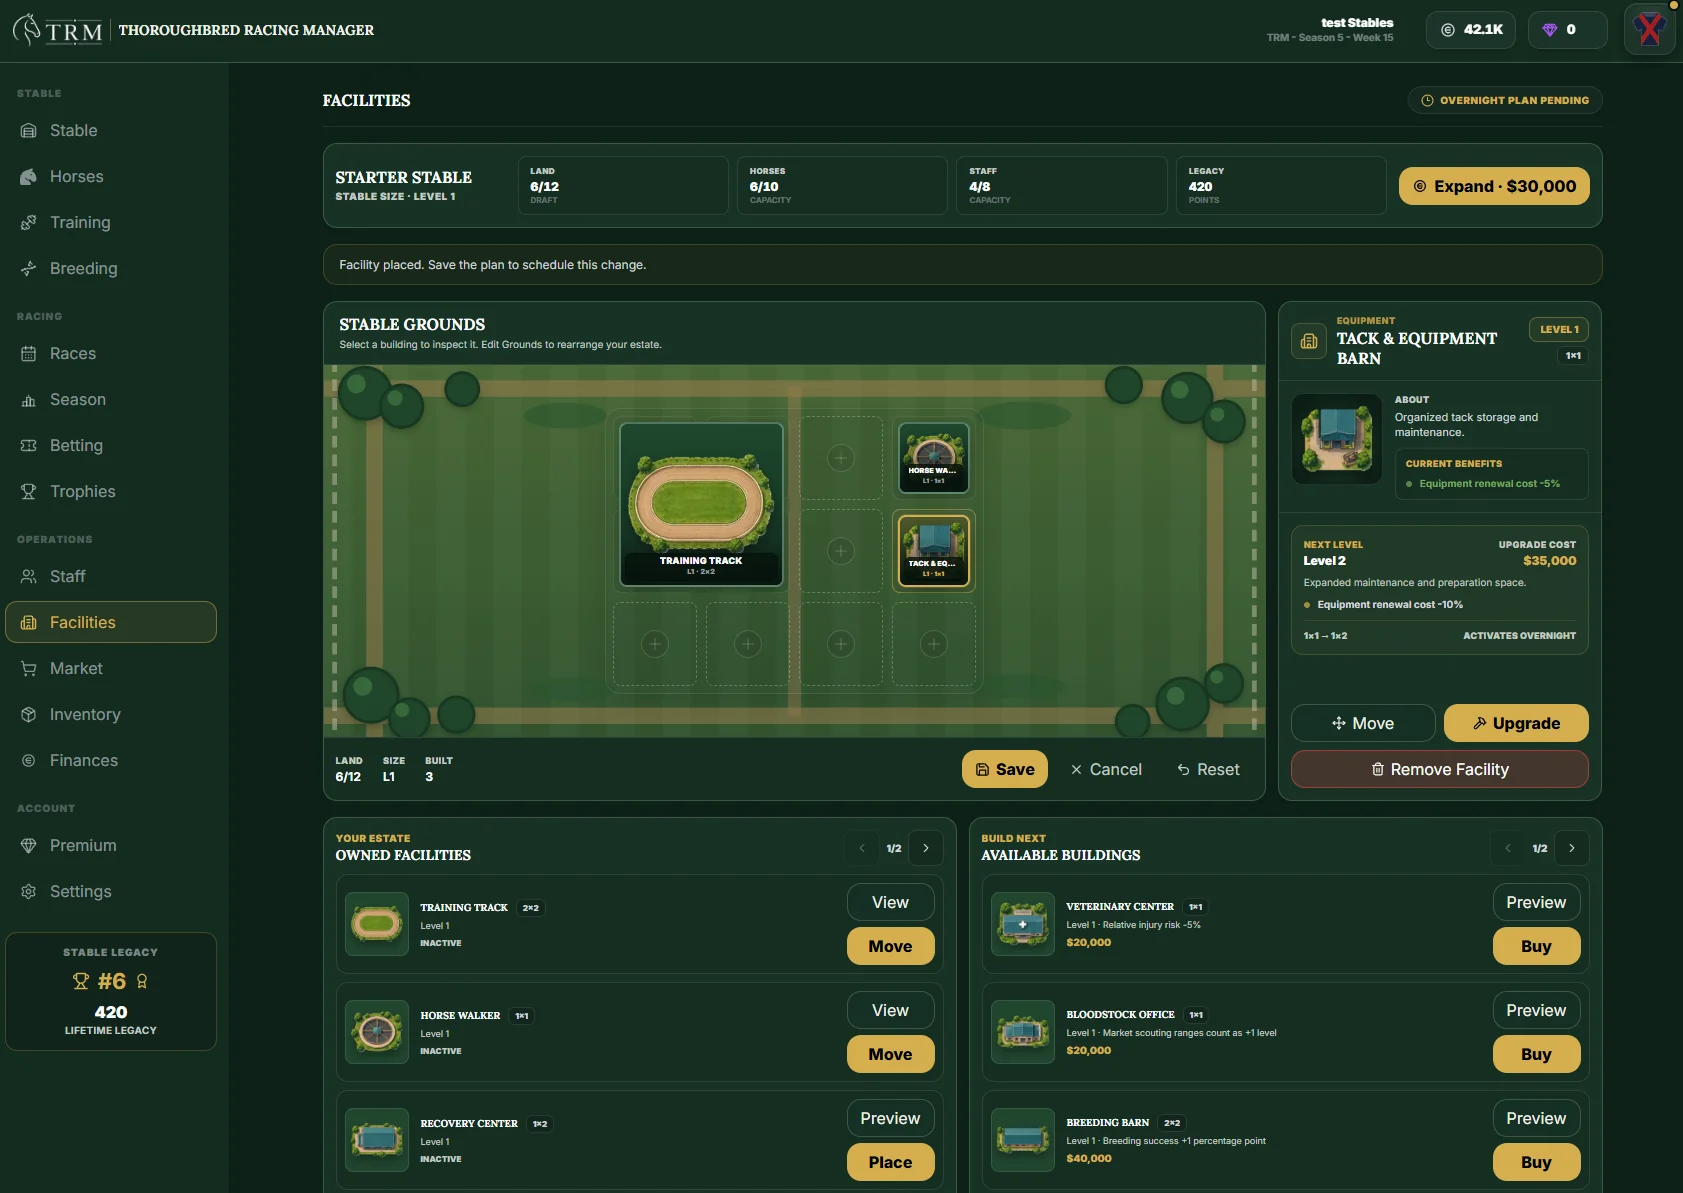
Open Stable Grounds
Facilities live on your square Stable Grounds grid. Each building has a footprint. Place it where it fits, and rotate rectangular footprints when you need to. The grid shows the building name and level so you can find it without relying on artwork.
Buy and place a facility
- Open Facilities and choose a building.
- Read the cost, footprint, and current-level benefits.
- Place the building on free ground. Check the outline before saving.
- Save your layout. Placement changes take effect overnight.
Removing a building from the grid does not sell it. Check the facility card before assuming a building's bonus is active.
Upgrade for the benefit you need
Different facilities support training gains, rest and recovery, injury prevention, equipment costs, breeding and foaling, or scouting. Upgrades can improve those benefits, but prices and effects vary by building and level. Read the actual benefit shown on each facility card before spending Coins.
For example, a Training Track supports workouts, a Recovery Center helps horses recover, and a Bloodstock Office can reveal founding-line information after enough market scouting. The effect depends on the level and whether the facility is active.
Know your capacity limits
Stable Size determines your available land and normal horse and staff capacity. The Starter Stable holds 10 horses and 8 staff. A Foaling Barn may add temporary overflow room for bred foals, but it does not increase capacity for Market purchases or Yearling Sale wins.
Check the result after the overnight update
Review your layout and facility cards after the next game-day update to confirm that the buildings you placed are active. Before buying another upgrade, compare its cost with the benefit you expect to use.
For staff contracts, equipment, and renewals, read the staff and equipment guide.